Add Outlook to Office2010
Before proceeding, please note that Google Chrome is necessary to access all the features of your Google Apps @ NCSU account. However, if you prefer Outlook and wish to add it your managed Office install, follow the instructions below.
- The directions on this page apply to Office 2010 or 2013.
Screenshots on this page were taken from the Office 2010 install. The Office 2013 install has some visual and textual differences, but the process is the same.
1. After you have confirmed that Office is installed on your machine and working normally, open the following Control Panel applet for your version of Windows:
- Windows 7 - Start > All Control Panel Items > Programs and Features
- Windows XP - Start > Control Panel > Add/Remove Programs
2. After the list of installed programs finishes loading, locate your Office install (either "Microsoft Office Professional Plus 2010" or "Microsoft Office Professional Plus 2013") in the list.
3. Select your Office install and choose to Change or Modify.
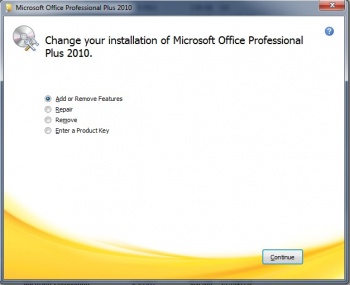
4. The window in Figure 1 below will appear. Choose to Add or Remove Features, then click Continue.
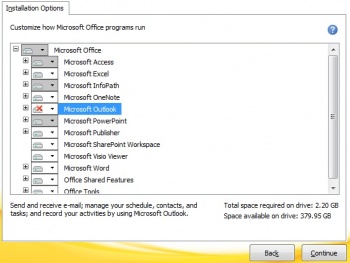
5. Under the Installation Options window (see Figure 2 below), find Microsoft Outlook and click the icon to its left.
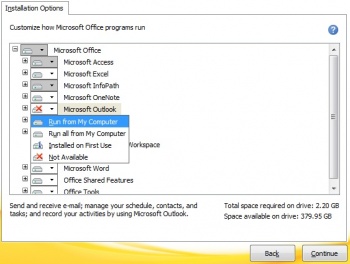
6. Select "Run from My Computer" from the menu (see Figure 3 below), then click Continue.
7. The installation will progress and install Outlook.
8. Once it is finished, click Close. You should now be able to find Outlook in the Office Programs folder (Start > Programs > Microsoft Office for 2010 or Start > Programs > Microsoft Office 2013 for Office 2013).
9. To configure Outlook for your Google Apps @ NCSU account, see this page, IMAP Settings from OIT


