Difference between revisions of "Active Directory/Documentation/Computer Migration Instructions"
Jump to navigation
Jump to search
| Line 11: | Line 11: | ||
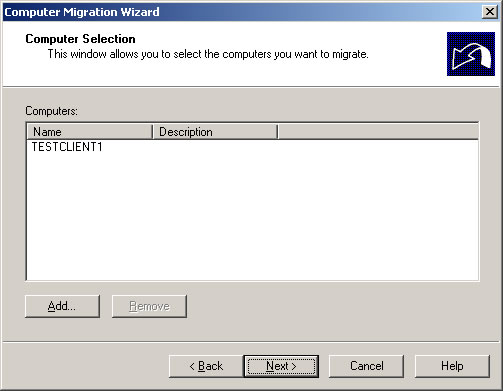
# Choose the computer(s) to migrate and click <b>Next</b>.<BR>[[Image:admt-cpu4.jpg]] | # Choose the computer(s) to migrate and click <b>Next</b>.<BR>[[Image:admt-cpu4.jpg]] | ||
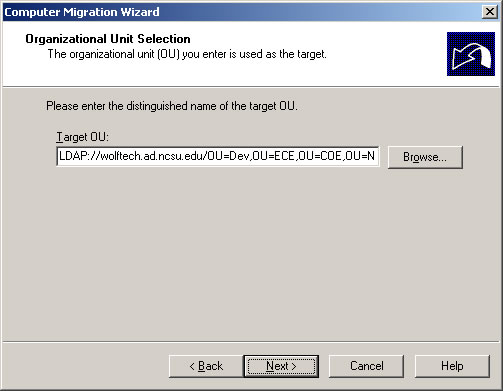
# Choose the target OU to migrate the computer(s) to and click <b>Next</b>.<BR>[[Image:admt-cpu5.jpg]] | # Choose the target OU to migrate the computer(s) to and click <b>Next</b>.<BR>[[Image:admt-cpu5.jpg]] | ||
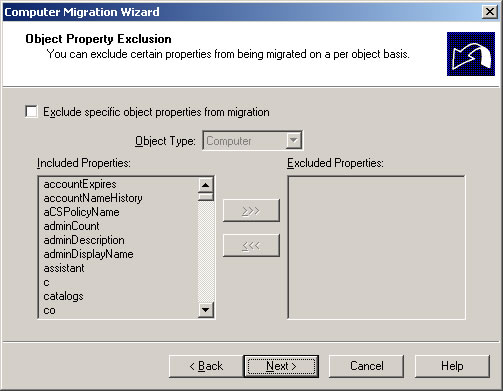
| − | [[Image:admt-cpu6.jpg]] | + | # Uncheck all the checkboxes and click <b>Next</b>. |
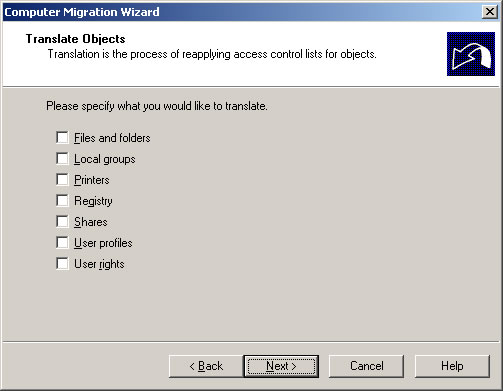
| − | [[Image:admt-cpu7.jpg]] | + | #* Note: This only translates intra-forest SIDs, so it's no help to us.<BR>[[Image:admt-cpu6.jpg]] |
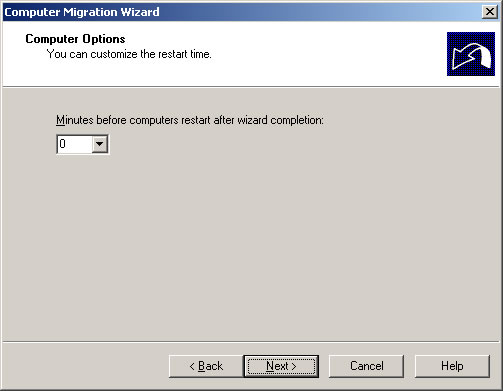
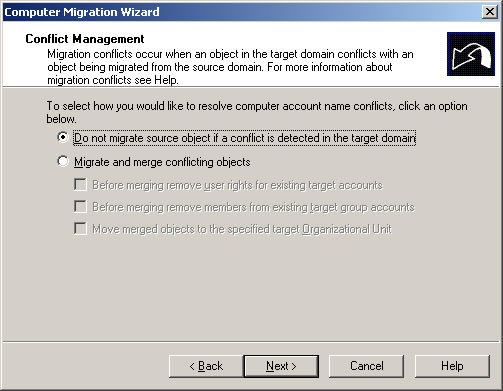
| − | [[Image:admt-cpu8.jpg]] | + | # Choose the number of minutes to wait before rebooting the migrated computer and click <b>Next</b>.<BR>[[Image:admt-cpu7.jpg]] |
| − | [[Image:admt-cpu9.jpg]] | + | # Keep the defaults and click <b>Next</b>.<BR>[[Image:admt-cpu8.jpg]] |
| − | [[Image:admt-cpu10.jpg]] | + | # Keep the defaults and click <b>Next</b>.<BR>[[Image:admt-cpu9.jpg]] |
| − | [[Image:admt-cpu11.jpg]] | + | # Click <b>Finish<b>.<BR>[[Image:admt-cpu10.jpg]] |
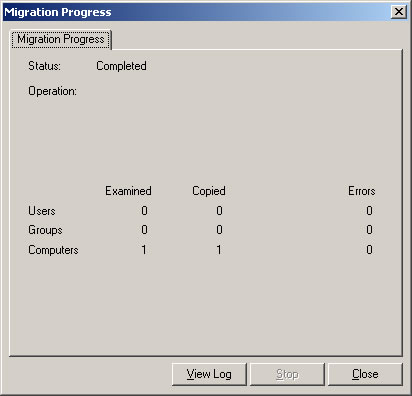
| − | [[Image:admt-cpu12.jpg]] | + | # The Compute Migration Wizard will now migrate the computer account(s). When it finishes, click <b>Close</b>. |
| + | #* If it completes successfully, the number of computers finished will be equal to the number examined and there will be zero errors. | ||
| + | #* If there are errors, view the log for details.<BR>[[Image:admt-cpu11.jpg]] | ||
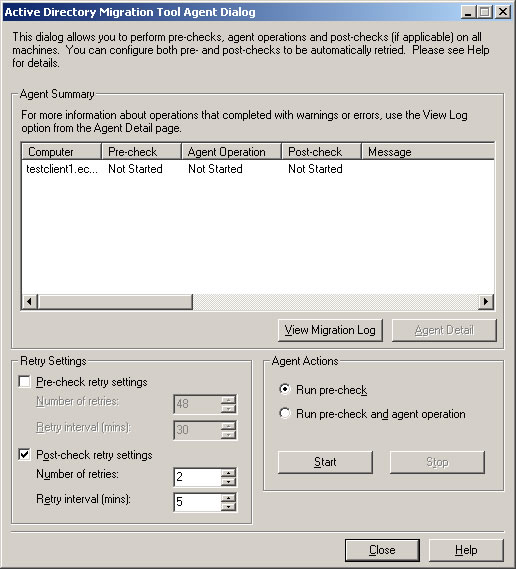
| + | # In the <b>Active Directory Migration Tool Agent Dialog, click <b>Start</b> to run the pre-check.<br>[[Image:admt-cpu12.jpg]] | ||
[[Image:admt-cpu13.jpg]] | [[Image:admt-cpu13.jpg]] | ||
[[Image:admt-cpu14.jpg]] | [[Image:admt-cpu14.jpg]] | ||
Revision as of 12:57, 15 March 2006
The following is the procedure to migrate a computer from the ECEW2K domain to the WOLFTECH domain.
Computer Migration
- Use RemoteDesktop to log in to the migration server (migration.ece.ncsu.edu). Log in using an account that is a member of the WOLFTECH\Computer Migrators group.
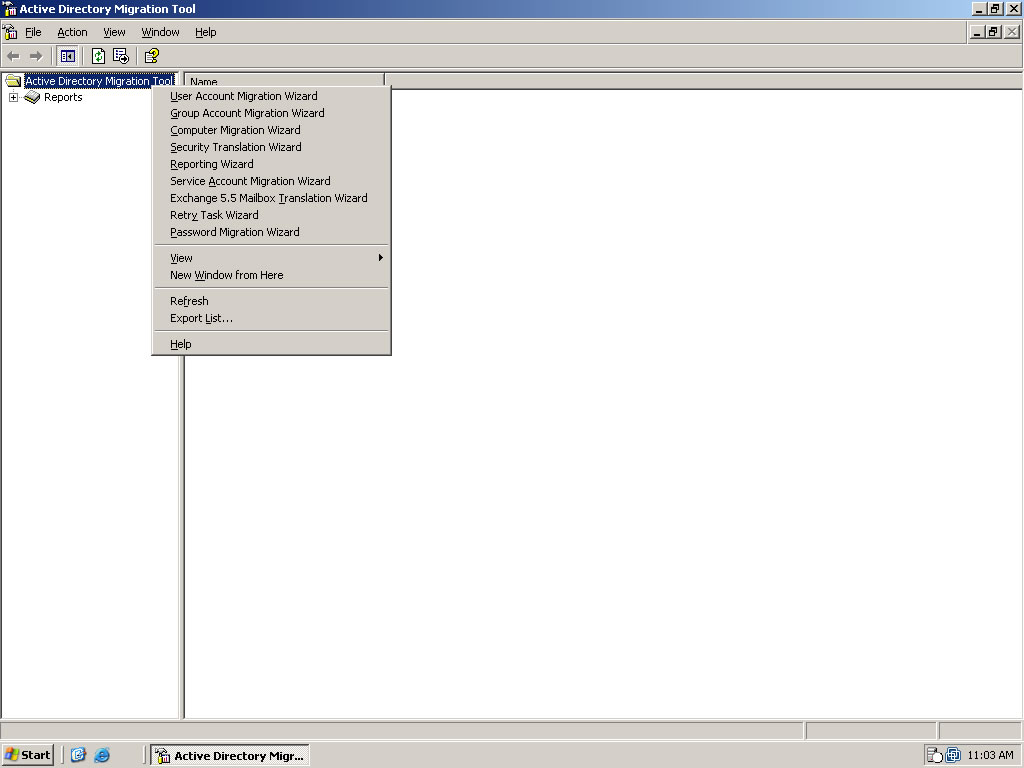
- The Active Directory Migration Tool will startup automatically.
- Right click Active Directory Migration Tool, and choose Computer Migration Wizard
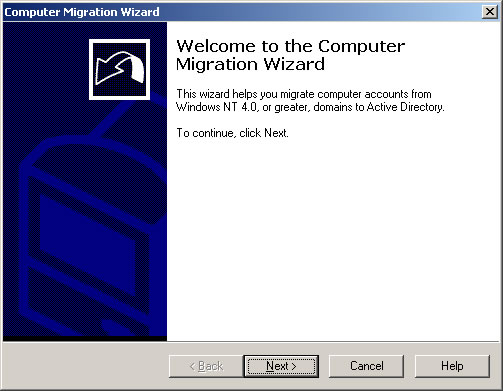
- You should see the Computer Migration Wizard, click Next.
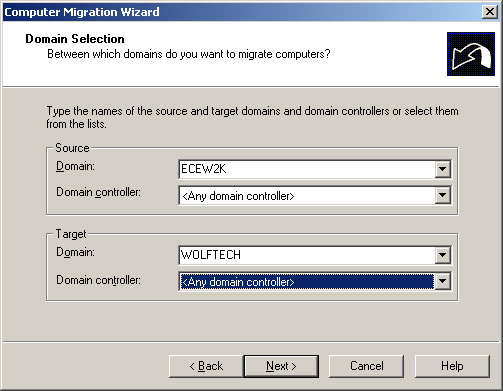
- Choose the source and target domains as shown and click Next.
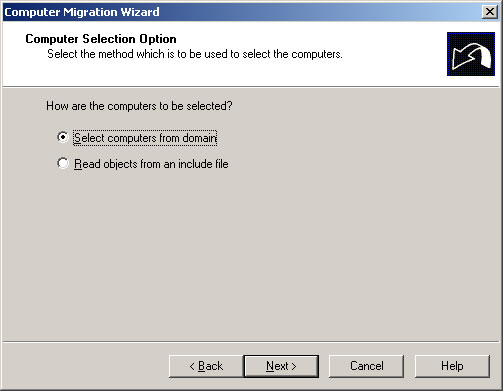
- Choose Select computers from domain and click Next.
- Choose the computer(s) to migrate and click Next.
- Choose the target OU to migrate the computer(s) to and click Next.
- Uncheck all the checkboxes and click Next.
- Note: This only translates intra-forest SIDs, so it's no help to us.
- Note: This only translates intra-forest SIDs, so it's no help to us.
- Choose the number of minutes to wait before rebooting the migrated computer and click Next.
- Keep the defaults and click Next.
- Keep the defaults and click Next.
- Click Finish.

- The Compute Migration Wizard will now migrate the computer account(s). When it finishes, click Close.
- If it completes successfully, the number of computers finished will be equal to the number examined and there will be zero errors.
- If there are errors, view the log for details.
- In the Active Directory Migration Tool Agent Dialog, click Start to run the pre-check.


SID Translation


