Difference between revisions of "Active Directory/Documentation/Computer Migration Instructions"
m |
|||
| (17 intermediate revisions by 3 users not shown) | |||
| Line 3: | Line 3: | ||
==Computer Migration== | ==Computer Migration== | ||
| − | # Use RemoteDesktop to log in to the migration server (migration.ece.ncsu.edu). Log in using an account that is a member of the WOLFTECH\Computer Migrators group. | + | The Computer Migration Wizard allows you to remotely migrate computers between domains. The following instructions explain how to use the Computer Migration Wizard to migrate computers from ECEW2K to WOLFTECH. |
| − | # The Active Directory Migration Tool will startup automatically. | + | |
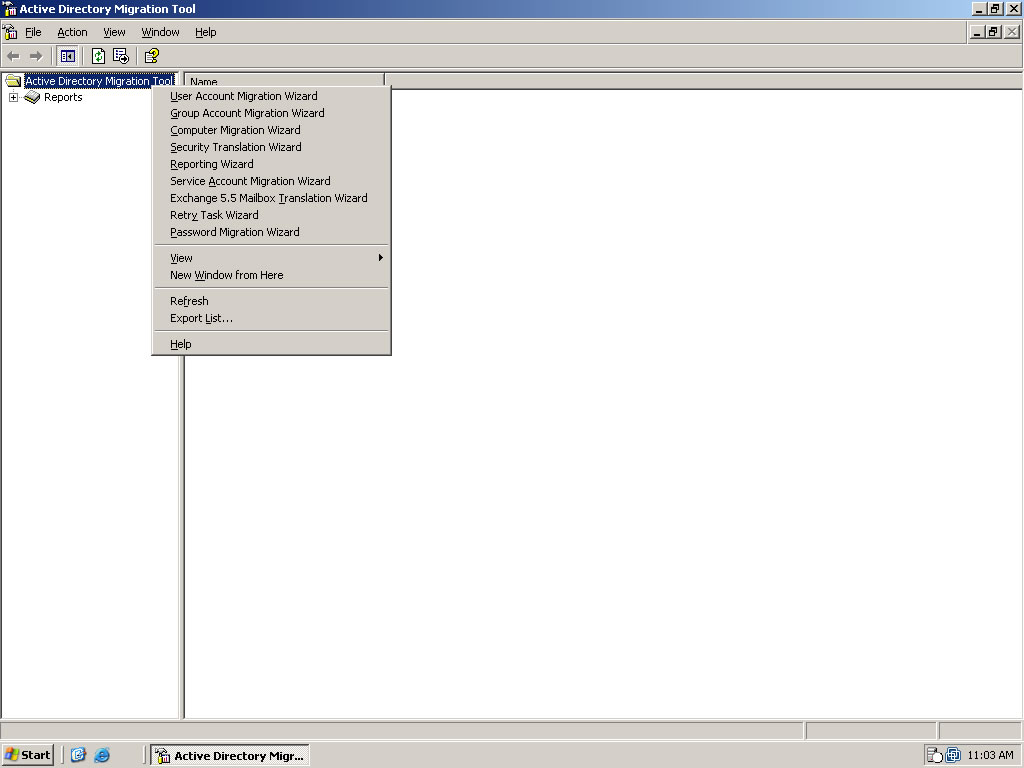
| − | # Right click Active Directory Migration Tool, and choose <b>Computer Migration Wizard</b><BR>[[Image:admt.jpg]] | + | # Use RemoteDesktop to log in to the migration server (migration.ece.ncsu.edu). Log in using an account that is a member of the WOLFTECH\Computer Migrators group.<BR><BR> |
| − | # You should see the Computer Migration Wizard | + | # The Active Directory Migration Tool will startup automatically.<BR><BR> |
| − | # Choose the source and target domains as shown and click <b>Next</b>.<BR>[[Image:admt-cpu2.jpg]] | + | # Right click <b>Active Directory Migration Tool</b>, and choose <b>Computer Migration Wizard</b>.<BR>[[Image:admt.jpg]]<BR><BR> |
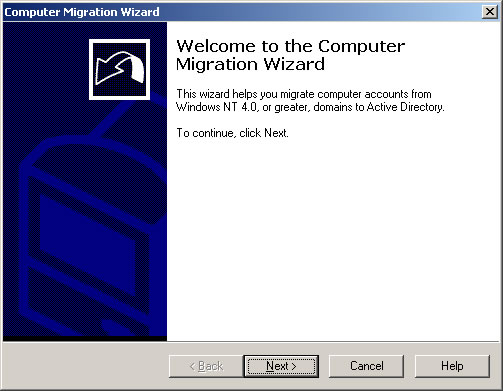
| − | # Choose <b>Select computers from domain<b> and click <b>Next</b>.<BR>[[Image:admt-cpu3.jpg]] | + | # You should see the Computer Migration Wizard. Click <b>Next</b>.<BR>[[Image:admt-cpu1.jpg]]<BR><BR> |
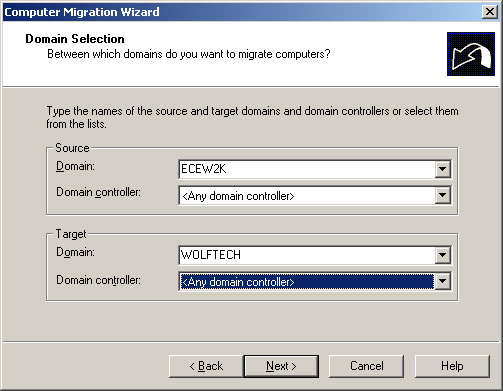
| − | # Choose the computer(s) to migrate and click <b>Next</b>.<BR>[[Image:admt-cpu4.jpg]] | + | # Choose the source and target domains as shown and click <b>Next</b>.<BR>[[Image:admt-cpu2.jpg]]<BR><BR> |
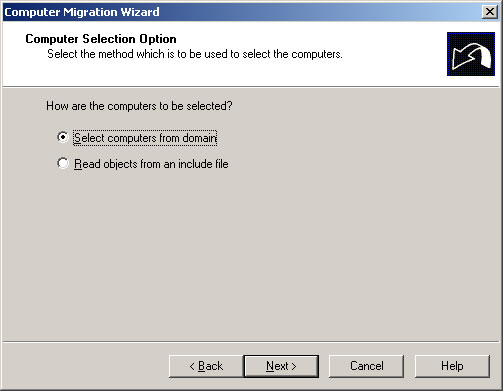
| − | # Choose the target OU to migrate the computer(s) to and click <b>Next</b>.<BR>[[Image:admt-cpu5.jpg]] | + | # Choose <b>Select computers from domain</b> and click <b>Next</b>.<BR>[[Image:admt-cpu3.jpg]]<BR><BR> |
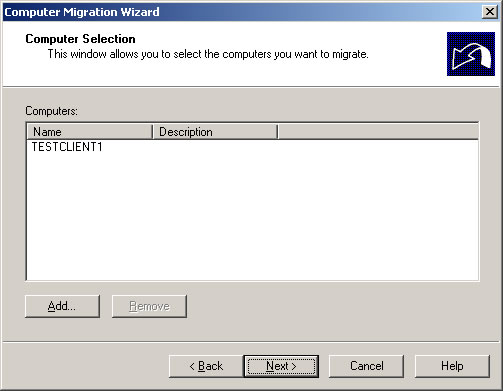
| + | # Choose the computer(s) to migrate and click <b>Next</b>.<BR>[[Image:admt-cpu4.jpg]]<BR><BR> | ||
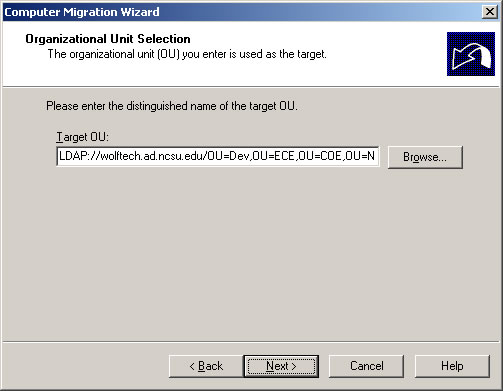
| + | # Choose the target OU to migrate the computer(s) to and click <b>Next</b>.<BR>[[Image:admt-cpu5.jpg]]<BR><BR> | ||
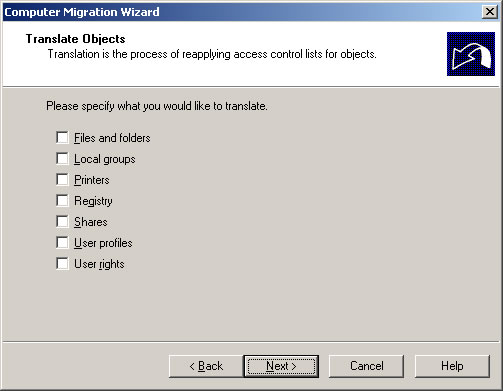
# Uncheck all the checkboxes and click <b>Next</b>. | # Uncheck all the checkboxes and click <b>Next</b>. | ||
| − | #* Note: This only translates intra-forest SIDs, so it's no help to us.<BR>[[Image:admt-cpu6.jpg]] | + | #* Note: This only translates intra-forest SIDs, so it's no help to us.<BR>[[Image:admt-cpu6.jpg]]<BR><BR> |
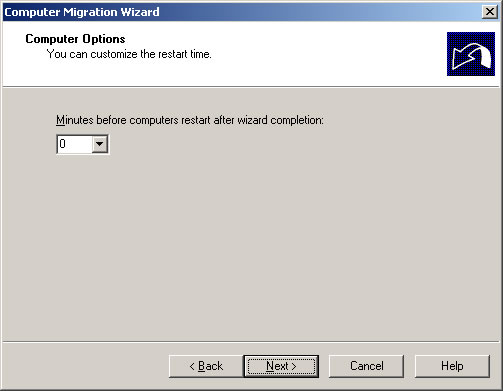
| − | # Choose the number of minutes to wait before rebooting the migrated computer and click <b>Next</b>.<BR>[[Image:admt-cpu7.jpg]] | + | # Choose the number of minutes to wait before rebooting the migrated computer and click <b>Next</b>.<BR>[[Image:admt-cpu7.jpg]]<BR><BR> |
| − | # Keep the defaults and click <b>Next</b>.<BR>[[Image:admt-cpu8.jpg]] | + | # Keep the defaults and click <b>Next</b>.<BR>[[Image:admt-cpu8.jpg]]<BR><BR> |
| − | # Keep the defaults and click <b>Next</b>.<BR>[[Image:admt-cpu9.jpg]] | + | # Keep the defaults and click <b>Next</b>.<BR>[[Image:admt-cpu9.jpg]]<BR><BR> |
| − | # Click <b>Finish<b>.<BR>[[Image:admt-cpu10.jpg]] | + | # Click <b>Finish</b>.<BR>[[Image:admt-cpu10.jpg]]<BR><BR> |
# The Compute Migration Wizard will now migrate the computer account(s). When it finishes, click <b>Close</b>. | # The Compute Migration Wizard will now migrate the computer account(s). When it finishes, click <b>Close</b>. | ||
#* If it completes successfully, the number of computers finished will be equal to the number examined and there will be zero errors. | #* If it completes successfully, the number of computers finished will be equal to the number examined and there will be zero errors. | ||
| − | #* If there are errors, view the log for details.<BR>[[Image:admt-cpu11.jpg]] | + | #* If there are errors, view the log for details.<BR>[[Image:admt-cpu11.jpg]]<BR><BR> |
| − | # In the <b>Active Directory Migration Tool Agent Dialog, click <b>Start</b> to run the pre-check.<br>[[Image:admt-cpu12.jpg]] | + | # Open the Active Directory Users and Computers console. Add the computer to the necessary groups before proceeding. |
| − | [[Image:admt-cpu13.jpg]] | + | # In the <b>Active Directory Migration Tool Agent Dialog</b>, click <b>Start</b> to run the pre-check.<br>[[Image:admt-cpu12.jpg]]<BR><BR> |
| − | [[Image:admt-cpu14.jpg]] | + | # If the pre-check passed, choose <b>Run pre-check and agent operation</b>, and click <b>Start</b>. |
| + | #* If the pre-check failed, click <b>View Migration Log</b> for details. | ||
| + | #* Common problems: | ||
| + | #** Make sure the firewall is configured correctly. | ||
| + | #** Make sure WOLFTECH\Computer Migrators is a member of the computer's local Administrators group.<br>[[Image:admt-cpu13.jpg]]<BR><BR> | ||
| + | # Once the migration wizard completes, make sure <b>Agent Operation</b> shows <b>Successful</b> and <b>Post-check</b> shows <b>Passed</b>. Click <b>Close</b> to exit the Computer Migration Wizard. | ||
| + | #* If there were any errors, click <b>View Migration Log</b> for details.<BR>[[Image:admt-cpu14.jpg]]<BR><BR> | ||
==SID Translation== | ==SID Translation== | ||
| + | The Security Translation Wizard allows you to update the SIDs from the source domain to the SIDs of the target domain in the ACLs. This allows you to migrate user profiles and permissions from the user's source domain account to the user's target domain account. | ||
| + | |||
| + | # Right click <b>Active Directory Migration Tool</b>, and choose <b>Security Translation Wizard</b>.<BR>[[Image:admt.jpg]]<BR><BR> | ||
| + | # You should see the Security Translation Wizard. Click <b>Next</b>.<BR>[[Image:admt-sid1.jpg]]<BR><BR> | ||
| + | # Choose <b>Other objects specified in file</b>. Click <b>Browse</b> and find <b>ECEW2K-SIDs.txt</b> located on the Desktop. Click <b>Next</b>.<BR>[[Image:admt-sid2.jpg]]<BR><BR> | ||
| + | # Choose the computer(s) you wish to translate security on and click <b>Next</b>.<BR>[[Image:admt-sid3.jpg]]<BR><BR> | ||
| + | # Check all the checkboxes and click <b>Next</b>.<BR>[[Image:admt-sid4.jpg]]<BR><BR> | ||
| + | # Select <b>Add</b> and click <b>Next</b>.<BR>[[Image:admt-sid5.jpg]]<BR><BR> | ||
| + | # Click <b>Finish</b>.<BR>[[Image:admt-sid6.jpg]]<BR><BR> | ||
| + | # You should now see the <b>Active Directory Migration Tool Agent Dialog</b>. Click <b>Start</b> to run a pre-check.<BR>[[Image:admt-sid7.jpg]]<BR><BR> | ||
| + | # If the pre-check passed, choose <b>Run pre-check and agent operation</b>, and click <b>Start</b>. | ||
| + | #* If the pre-check failed, click <b>View Migration Log</b> for details. | ||
| + | #* Common problems: | ||
| + | #** Make sure the firewall is configured correctly. | ||
| + | #** Make sure WOLFTECH\Computer Migrators is a member of the computer's local Administrators group.<BR>[[Image:admt-sid8.jpg]]<BR><BR> | ||
| + | # Once the migration wizard completes, make sure <b>Agent Operation</b> shows <b>Successful</b>. Click <b>Close</b> to exit the Computer Migration Wizard. | ||
| + | #* If there were any errors, click View Migration Log for details.<BR>[[Image:admt-sid9.jpg]]<BR><BR> | ||
| + | |||
| + | ==FAQs== | ||
| + | '''NOTE:''' Be very careful when making changes to the Windows Registry, and do not delete keys unless you are certain. Do NOT make changes to Windows Registry unless you are comfortable doing so. Ask Patrick or Brian for assistance. | ||
| − | + | # If a user logs in with their WOLFTECH account before SID translation is complete, do this: | |
| − | + | #* Delete the profile directory under C:\Documents and Settings (usually username.WOLFTECH). | |
| − | + | #* Delete the registry key for the user under HKEY_LOCAL_MACHINE\SOFTWARE\Microsoft\Windows NT\CurrentVersion\ProfileList. The key to delete is the users WOLFTECH SID.<br><br> | |
| − | + | # After translation is complete, log in to the machine and remove any softwares that were installed manually. Also uninstall pdfFactory Pro 2.25 if it is on the machine, since this package does not uninstall properly when done automatically.<br><br> | |
| − | + | # If any assigned softwares do not install, gpupdate and reboot. If they still do not install, or if they do not install properly, you will need to: | |
| − | + | #* Go into Control Panel -> Add/Remove Programs, and remove the offending program from the list if it is there. | |
| − | + | #* Open Registry Editor and navigate to HKEY_CLASSES_ROOT/Installer/Products. Search through the keys under Products and find the key associated with the offending program (look for the program name under the string ProductName) and delete it. | |
| − | + | #* Navigate to HKEY_LOCAL_MACHINE\SOFTWARE\Microsoft and start a search (CTRL+F). Search for the name of the GPO associated with the offending program and delete any keys that match. An easy search to perform is the name of the program preceded by a dash, for example, "-Wolfcall". | |
| − | + | #* Close Registry Editor, gpupdate, and reboot. | |
| + | #Where do you get your version of ECEW2K-SIDs.txt from? | ||
| + | #*If you have a two-way trust and you know that the source accounts all match Unity IDs, you can simply do this: <SRC DOM>\<unityid>,WOLFTECH\<unityid> | ||
| + | #*Exporting a list of userids from the source domain should be easy with your favorite LDAP client. | ||
| + | #*If you have a one-way trust, you'll need to use the SIDs for the source accounts. This is also easy to do with LDAP Browser. Just export a list of sAMAccountName and objectSID. | ||
Latest revision as of 10:03, 13 May 2008
The following is the procedure to migrate a computer from the ECEW2K domain to the WOLFTECH domain.
Computer Migration
The Computer Migration Wizard allows you to remotely migrate computers between domains. The following instructions explain how to use the Computer Migration Wizard to migrate computers from ECEW2K to WOLFTECH.
- Use RemoteDesktop to log in to the migration server (migration.ece.ncsu.edu). Log in using an account that is a member of the WOLFTECH\Computer Migrators group.
- The Active Directory Migration Tool will startup automatically.
- Right click Active Directory Migration Tool, and choose Computer Migration Wizard.
- You should see the Computer Migration Wizard. Click Next.
- Choose the source and target domains as shown and click Next.
- Choose Select computers from domain and click Next.
- Choose the computer(s) to migrate and click Next.
- Choose the target OU to migrate the computer(s) to and click Next.
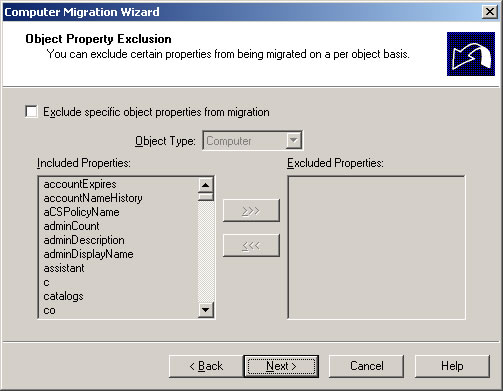
- Uncheck all the checkboxes and click Next.
- Note: This only translates intra-forest SIDs, so it's no help to us.
- Note: This only translates intra-forest SIDs, so it's no help to us.
- Choose the number of minutes to wait before rebooting the migrated computer and click Next.
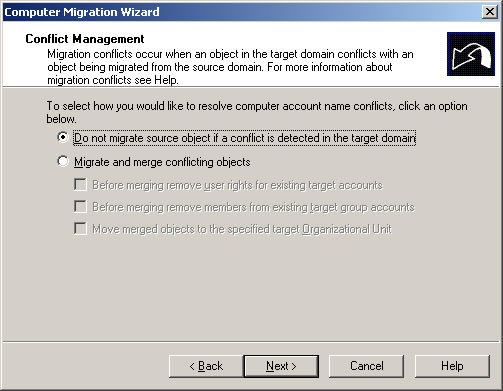
- Keep the defaults and click Next.
- Keep the defaults and click Next.
- Click Finish.

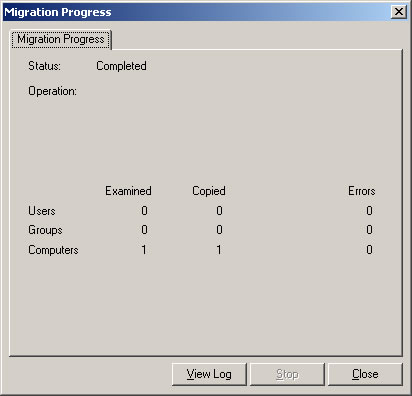
- The Compute Migration Wizard will now migrate the computer account(s). When it finishes, click Close.
- If it completes successfully, the number of computers finished will be equal to the number examined and there will be zero errors.
- If there are errors, view the log for details.
- Open the Active Directory Users and Computers console. Add the computer to the necessary groups before proceeding.
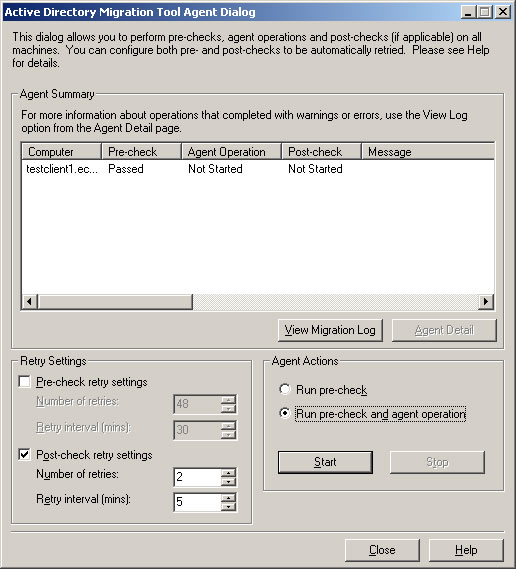
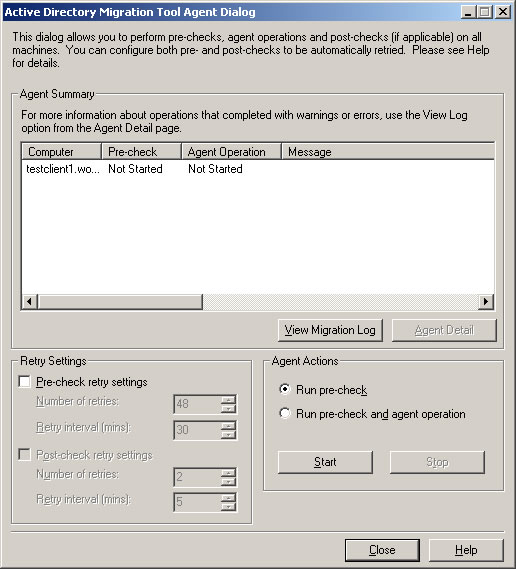
- In the Active Directory Migration Tool Agent Dialog, click Start to run the pre-check.
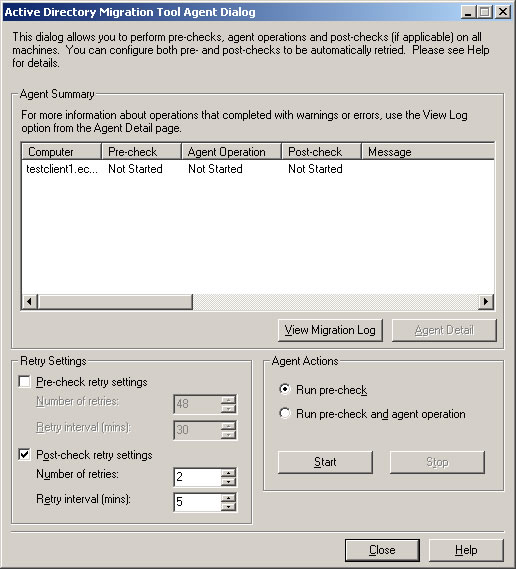
- If the pre-check passed, choose Run pre-check and agent operation, and click Start.
- If the pre-check failed, click View Migration Log for details.
- Common problems:
- Make sure the firewall is configured correctly.
- Make sure WOLFTECH\Computer Migrators is a member of the computer's local Administrators group.
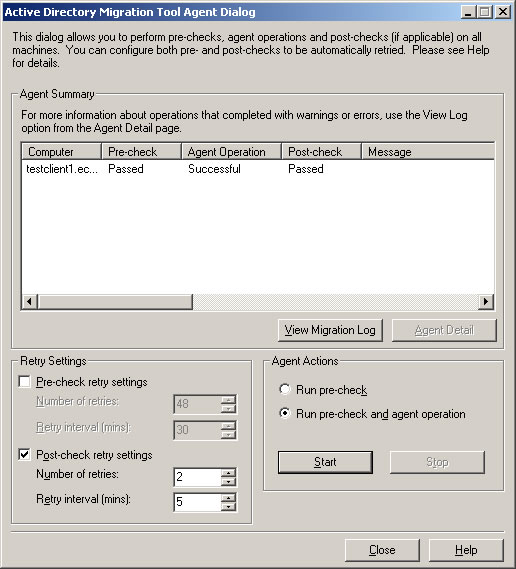
- Once the migration wizard completes, make sure Agent Operation shows Successful and Post-check shows Passed. Click Close to exit the Computer Migration Wizard.
- If there were any errors, click View Migration Log for details.
- If there were any errors, click View Migration Log for details.


SID Translation
The Security Translation Wizard allows you to update the SIDs from the source domain to the SIDs of the target domain in the ACLs. This allows you to migrate user profiles and permissions from the user's source domain account to the user's target domain account.
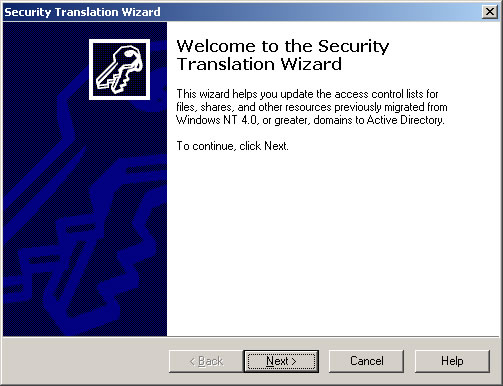
- Right click Active Directory Migration Tool, and choose Security Translation Wizard.
- You should see the Security Translation Wizard. Click Next.
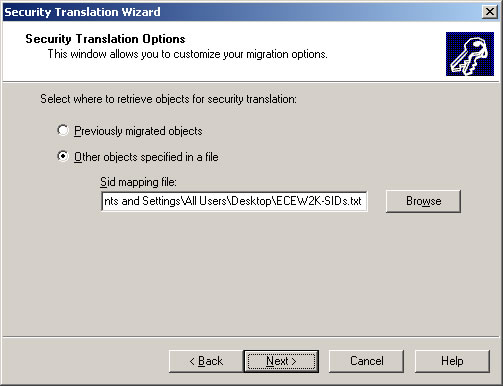
- Choose Other objects specified in file. Click Browse and find ECEW2K-SIDs.txt located on the Desktop. Click Next.
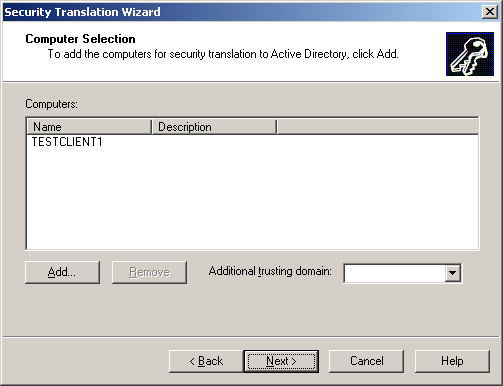
- Choose the computer(s) you wish to translate security on and click Next.
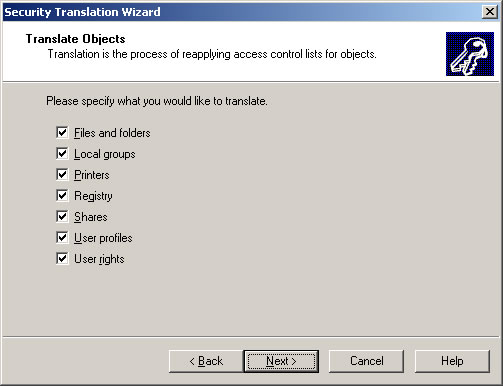
- Check all the checkboxes and click Next.
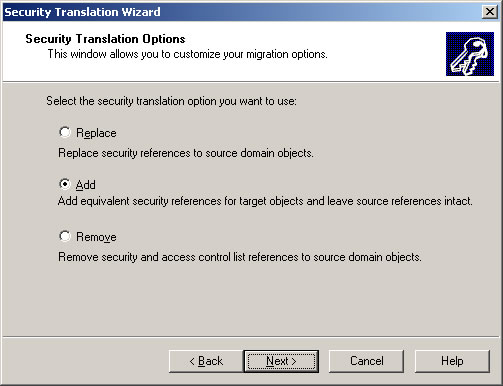
- Select Add and click Next.
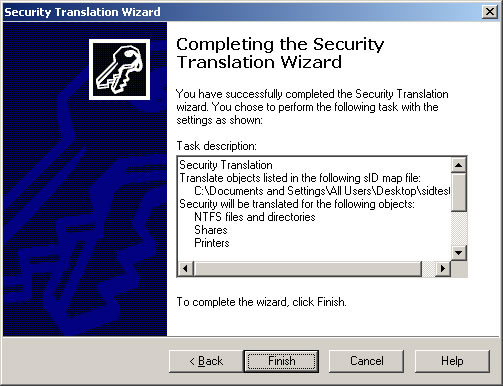
- Click Finish.
- You should now see the Active Directory Migration Tool Agent Dialog. Click Start to run a pre-check.
- If the pre-check passed, choose Run pre-check and agent operation, and click Start.
- If the pre-check failed, click View Migration Log for details.
- Common problems:
- Make sure the firewall is configured correctly.
- Make sure WOLFTECH\Computer Migrators is a member of the computer's local Administrators group.

- Once the migration wizard completes, make sure Agent Operation shows Successful. Click Close to exit the Computer Migration Wizard.
- If there were any errors, click View Migration Log for details.

- If there were any errors, click View Migration Log for details.


FAQs
NOTE: Be very careful when making changes to the Windows Registry, and do not delete keys unless you are certain. Do NOT make changes to Windows Registry unless you are comfortable doing so. Ask Patrick or Brian for assistance.
- If a user logs in with their WOLFTECH account before SID translation is complete, do this:
- Delete the profile directory under C:\Documents and Settings (usually username.WOLFTECH).
- Delete the registry key for the user under HKEY_LOCAL_MACHINE\SOFTWARE\Microsoft\Windows NT\CurrentVersion\ProfileList. The key to delete is the users WOLFTECH SID.
- After translation is complete, log in to the machine and remove any softwares that were installed manually. Also uninstall pdfFactory Pro 2.25 if it is on the machine, since this package does not uninstall properly when done automatically.
- If any assigned softwares do not install, gpupdate and reboot. If they still do not install, or if they do not install properly, you will need to:
- Go into Control Panel -> Add/Remove Programs, and remove the offending program from the list if it is there.
- Open Registry Editor and navigate to HKEY_CLASSES_ROOT/Installer/Products. Search through the keys under Products and find the key associated with the offending program (look for the program name under the string ProductName) and delete it.
- Navigate to HKEY_LOCAL_MACHINE\SOFTWARE\Microsoft and start a search (CTRL+F). Search for the name of the GPO associated with the offending program and delete any keys that match. An easy search to perform is the name of the program preceded by a dash, for example, "-Wolfcall".
- Close Registry Editor, gpupdate, and reboot.
- Where do you get your version of ECEW2K-SIDs.txt from?
- If you have a two-way trust and you know that the source accounts all match Unity IDs, you can simply do this: <SRC DOM>\<unityid>,WOLFTECH\<unityid>
- Exporting a list of userids from the source domain should be easy with your favorite LDAP client.
- If you have a one-way trust, you'll need to use the SIDs for the source accounts. This is also easy to do with LDAP Browser. Just export a list of sAMAccountName and objectSID.