Add Printer to domained Windows 7
All network printers in the ECE Department must be accessed through our central print server, ECE-PRINT-03.
Directory search allows you to make a search for the printer you wish to connect to, based on its name, location, or model. With this option, you can find a printer even if you do not know its name.
This guide is for adding a printer in Microsoft Windows 7, 8, or 8.1. However, please note that the images were taken from Windows 7, and so there may be minor differences in appearance and text if you are using a newer Windows OS.
Step 1 - Starting the Add Printer Wizard
To start the Add Printer wizard, click on the Start button, then click on Control Panel.
- If you are viewing all items, simply select Devices and Printers.
- If you are viewing categories, select the Hardware and Sound category, and then select Devices and Printers.
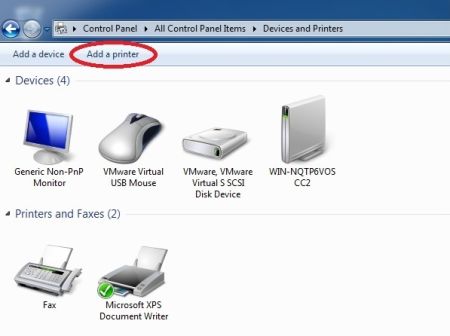
Once Devices and Printers opens, click on "Add a Printer" on the bar right below the address bar, as shown in Figure 1.
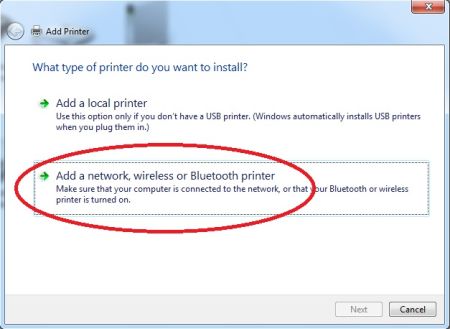
Choose the second option, "Add a network, wireless or Bluetooth printer", and hit NEXT to proceed to the next step. Figure 2 shows this step.
Step 2 - Choosing the Directory Search
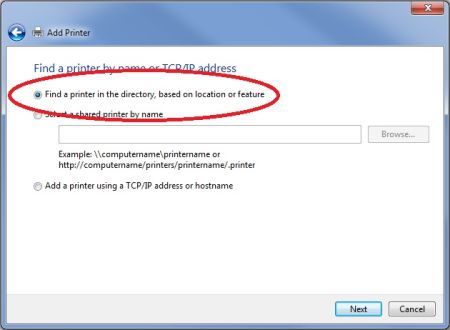
At the next window, referring to Figure 3 be sure to select "Find a printer in the directory, based on location or feature", then click the NEXT button to proceed.
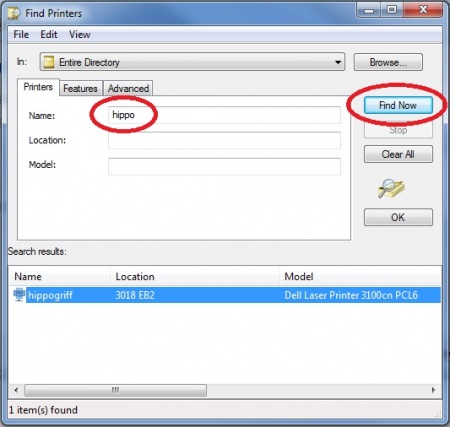
You have three search options, name, location, or model. Fill in one or more of the blanks and then click the Find Now button. You can enter in partial information and the search will return all printers that match.
Figure 4 above shows an example. As you can see, we've entered "hippo" into the Name blank and started a search. The search has returned with HIPPOGRIFF as the only printer that matches that criteria.
Step 3 - Connecting to the Printer
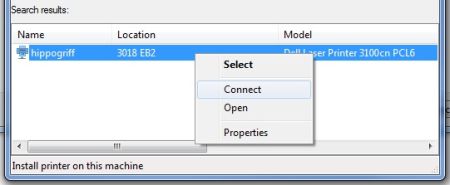
Once you've completed the search and have found the printer you want, right-click on the printer's entry. You will get a menu as shown in Figure 5. Choose the "Connect" option and your computer will attempt to add the printer. Once the computer has connected to the printer, hit OK.
Should the wizard fail at this step, you may not have permissions to the printer you are attempting to add, or it may not have compatible drivers for your OS/architecture. Email ecehelp@ncsu.edu with the name of the printer and a description of your issue.
Step 4 - Finish the Wizard
The next window that comes up will have the printer's name on it, and in some cases, the option to make it your default printer. Simply verify that the printer name shown is the one you want to add and hit NEXT.
Finally, you will be prompted to end the Printer Add Wizard. This window also gives you the option to print a test page to verify that the printer is working. If you wish to do so, click "Print Test Page", otherwise click FINISH.
